One way to overcome this problem is to embed your font files in the Powerpoint file. Our guide below will show you where to go to enable this setting.
Include Font Files in Powerpoint 2013 Presentations
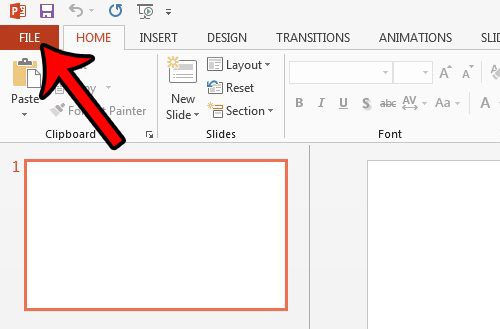
The steps below will change the settings for presentations that you create in Powerpoint 2013 by automatically embedding font files in the presentation. This will allow other people who are viewing the presentation on their own computers to view your text in the correct font, even if it is not installed on their computers. Step 1: Open Powerpoint 2013. Step 2: Click the File tab at the top-left corner of the window.
Step 3: Click the Options button at the bottom of the column on the left side of the window. This opens a new window titled Powerpoint Options.
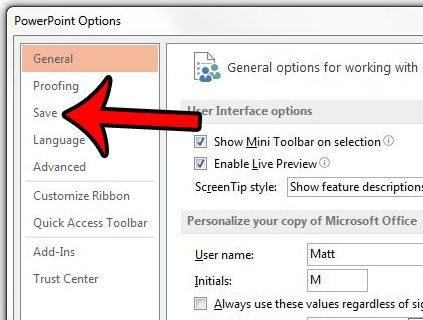
Step 4: Click the Save tab at the left side of the Powerpoint Options window.
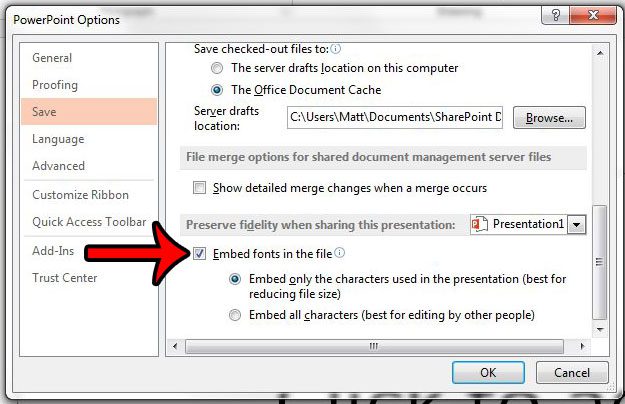
Step 5: Scroll to the bottom of this menu, then check the box to the left of Embed fonts in the file. If other people viewing the file will be editing it, then it is best to also select the Embed all characters option in this section. You can then click the OK button at the bottom of the Powerpoint Options window to close it and apply your changes.
Do you have a presentation that you need to play on a continuous loop, such as at a trade show, or as a display in a retail store? Learn how to loop a Powerpoint presentation so that you won’t need to manually restart it each time. After receiving his Bachelor’s and Master’s degrees in Computer Science he spent several years working in IT management for small businesses. However, he now works full time writing content online and creating websites. His main writing topics include iPhones, Microsoft Office, Google Apps, Android, and Photoshop, but he has also written about many other tech topics as well. Read his full bio here.
You may opt out at any time. Read our Privacy Policy


