But you might find that you are often clicking the wrong menu item by accident, which is slowing down your productivity. Even worse is when the item that you are clicking is something that takes a while to load, or isn’t an option that you ever need to change. Our guide below will show you how to remove a menu item in Photoshop so that you don’t need to worry about it clicking it anymore.
How to Hide a Photoshop Menu Item
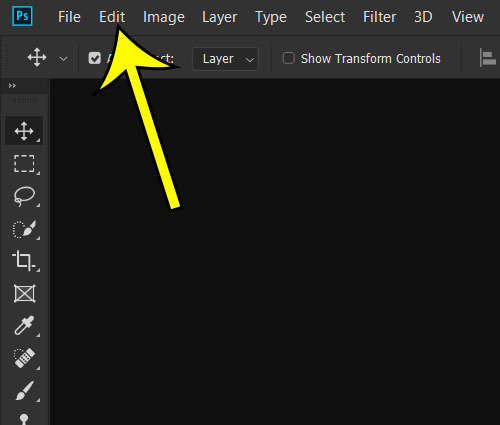
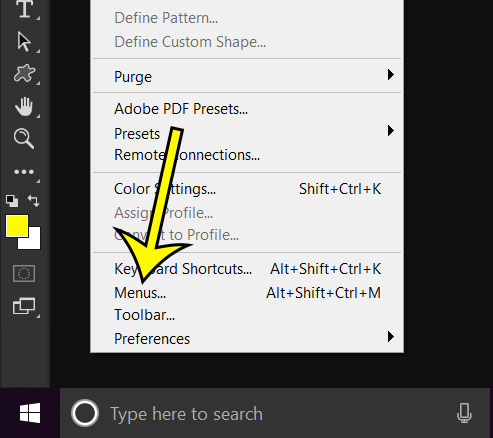
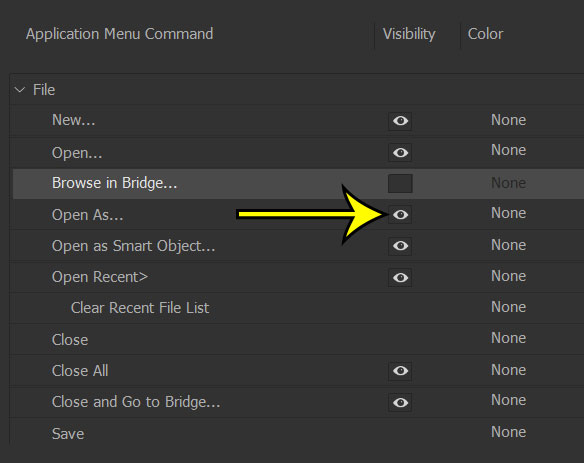
The steps in this article were performed on the Windows version of Photoshop CC. If you elect to hide one of the menu items using the steps below, you can always return to this menu in the future to unhide that option. Step 1: Open Photoshop. Step 2: Select the Edit tab at the top of the window. Step 3: Choose Menus at the bottom of this menu. Step 4: Click the top-level menu item containing the option you wish to hide. Step 5: Click the eye icon next to the menu item to hide it. Once you’ve finished hiding menu items, click OK at the top-right of the window. Troubleshooting a Photoshop problem and need to know how to send information to the person helping you? Find out how to get your system information from Photoshop so that you can give that person the info they need. He specializes in writing content about iPhones, Android devices, Microsoft Office, and many other popular applications and devices. Read his full bio here.