But if you had set this up previously, or if someone else has done it for you, it’s possible that you don’t want to use it, or may not even know that it’s happening. Our tutorial below will show you how to turn off a scheduled Do Not Disturb mode if you would prefer not to enter that mode at the same time every day. Our tutorial on how to turn off Do Not Disturb on iPhone 7 provides additional information on this iPhone feature.
How to Shut Off Scheduled Do Not Disturb on an iPhone
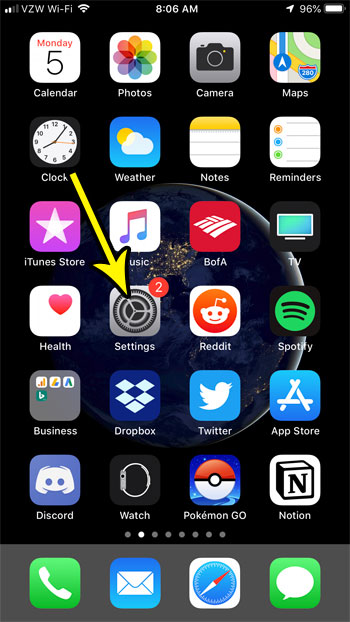
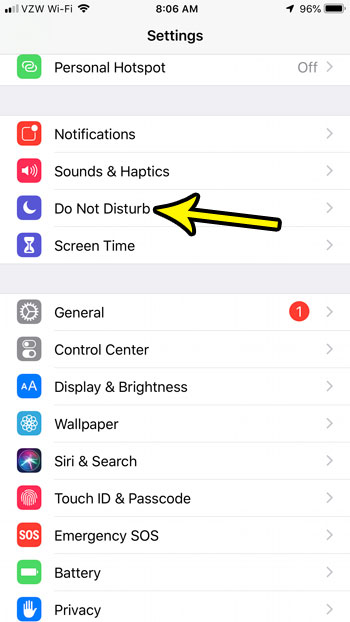
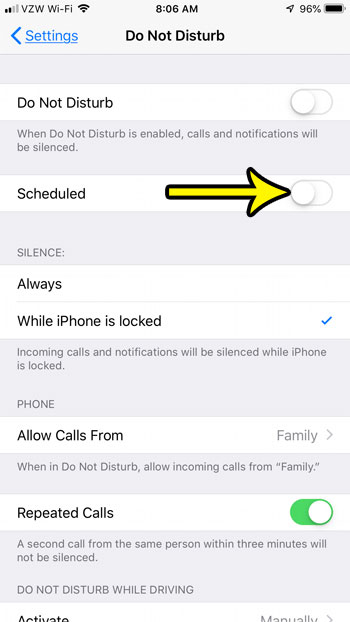
The steps in this article were performed on an iPhone 7 Plus in iOS 12. This guide assumes that your iPhone is currently going into Do Not Disturb mode at the same time every day, thereby preventing you from receiving phone calls when it is active. By completing these steps you will turn off this scheduled Do Not Disturb mode, meaning that you will receive calls during this time period. Step 1: Open the Settings menu. Step 2: Select the Do Not Disturb option. Step 3: Tap the button to the right of Scheduled to turn it off. You can always come back here and re-enable the Scheduled Do Not Disturb mode if you find that you prefer it. Alternatively you could tap the button to the right of Do Not Disturb at the top of the screen if you would like to manually enter that mode whenever you want to. Note, however, that you will need to remember to turn off Do Not Disturb later when you are ready to receive calls again. Is your iPhone getting low on storage space? Find out about some ways to delete iPhone items if you need additional room for new apps or files. He specializes in writing content about iPhones, Android devices, Microsoft Office, and many other popular applications and devices. Read his full bio here.


